
How to Perfectly Calibrate Your Golf Simulator Projector: Keystoning, Lens Shift, and More
- Hoza Mc.Ferdinand
- Aug 11, 2025
- 7 min read

I remember the first time I set up a golf simulator projector, I thought it would be as simple as pointing it at the screen and hitting "on". Boy, was I wrong! I had this big, beautiful screen, but the image was a trapezoid, and no matter what I did, I couldn’t get it to fit right. It was so frustrating. I felt like I was spending more time messing with settings than actually practicing my swing. But after a lot of trial and error—and a few choice words—I finally got it dialed in. That's why I'm writing this for you, so you don't have to go through the same headache I did. You need to know
how do I calibrate my golf simulator projector to fit my screen perfectly? It's not just about getting a picture on the screen; it's about making that picture an immersive, accurate representation of the course. Getting the alignment and fit just right makes all the difference, and trust me, it's a lot easier than you might think once you understand the key adjustments.
The Basics of Projector Calibration

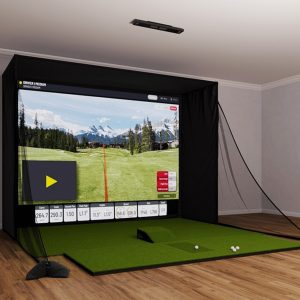
Before we get into the nitty-gritty of keystoning and lens shift, let's talk about the big picture. When you first set up your projector, you'll probably notice that the image doesn’t perfectly fill the rectangular screen. It might be too small, too large, or, most commonly, a bit crooked. This isn't a flaw in your projector; it's a consequence of its placement relative to the screen. The goal of calibration is to take that initial image and manipulate it to fit your specific screen dimensions perfectly. It’s about creating a true rectangle that fills the entire surface, ensuring that your golf ball's flight path and the on-screen graphics are as accurate as possible. Without proper calibration, you might feel like you're aiming at a different spot than where your virtual ball is going, which is a major bummer.
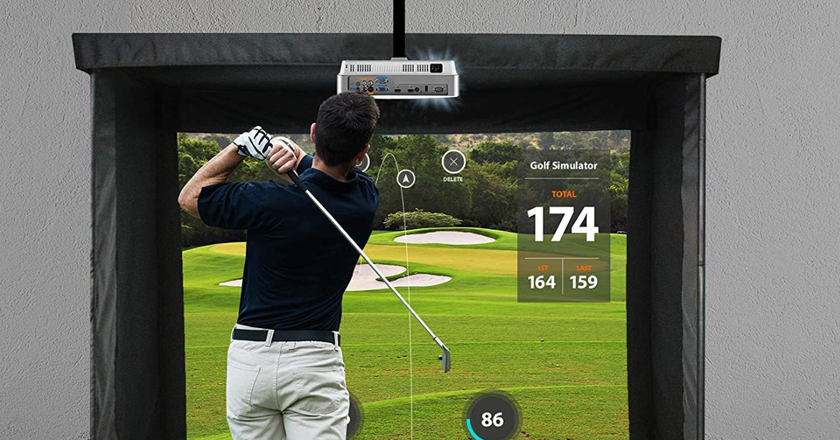
The process of calibration is important for a few key reasons. First, a perfectly aligned image enhances the realism and immersion of your simulator. You want to feel like you're actually on the course, not just hitting into a screen with a skewed picture. Second, it ensures that the aspect ratio is correct. If the picture is stretched or compressed, a perfectly straight drive might look like a slice or a hook, which is no good for practice. Finally, proper calibration prevents eye strain and makes for a more comfortable experience during long sessions. A distorted image can be tiring to look at, and we're here to have fun, not get a headache.
Understanding Keystoning
I'm going to tell you a secret: I used to think keystoning was the magical button that fixed everything. Keystoning is a digital correction that adjusts a trapezoidal image into a rectangular one. It's a lifesaver when you can't place your projector perfectly centered with the screen. For instance, if your projector is mounted higher than the center of the screen, the top of the image will be wider than the bottom, creating a vertical keystone effect. Horizontal keystoning happens when the projector is off to one side, making one side of the image wider than the other.
Here's the thing about keystoning: it's a digital fix, not an optical one. The projector takes the native rectangular image and digitally squishes or stretches it to fit the screen. This process, while incredibly convenient, can actually degrade the image quality a little bit. Because it's manipulating the pixels, you might lose a little bit of sharpness. For a golf simulator, where every detail matters, this is a trade-off you need to consider. My advice is to use keystoning as a last resort, or at least to a minimum, after you've exhausted other options. Sometimes you just gotta use it, and that’s fine, but it’s good to know what’s happening under the hood.
Unlocking the Power of Lens Shift
Now, this is where the real magic happens, folks. If your projector has a lens shift feature, use it!. Lens shift is a physical adjustment that moves the lens inside the projector without having to move the entire unit. This is a massive advantage because it moves the projected image optically, which means it doesn't digitally distort or compromise the image quality at all. You get a perfect, crisp picture from edge to edge.
There's both vertical and horizontal lens shift. Vertical lens shift lets you move the image up or down, which is super useful if your projector is mounted high up in the ceiling or on a shelf below the screen. Horizontal lens shift lets you move the image left or right, a total game-changer if you can't mount your projector perfectly centered with your screen. For a golf simulator, this is the gold standard for adjustments. It's a feature you should definitely look for when buying a projector, especially if you have a tricky mounting situation. Trust me, it saves you so many headaches in the long run. My old projector didn't have this, and I had to physically move the whole unit around and re-angle it every time I made a small tweak, which was such a pain.
Other Key Adjustments
Keystoning and lens shift are the big two, but there are a few other settings you should pay attention to. The first is
zoom. This is pretty straightforward: it adjusts the size of the image to fill your screen. You’ll use this to get the image as close to the edges of your screen as possible before you start the fine-tuning. The second is
focus. It’s easy to overlook this one, but a slightly blurry image can make a huge difference in how immersive your experience is. Adjust the focus until the image is razor-sharp from corner to corner.
Then there’s the
aspect ratio. Most golf simulators output in a 16:9 or 4:3 ratio, and your projector should be set to match that. If you've ever seen a picture that looks squished or stretched, that's often an aspect ratio mismatch. You want to make sure your simulator's settings, your computer's settings, and your projector's settings all align. I remember I once had my computer set to 16:9 and my projector to 4:3 and the virtual golf ball looked like an egg! It’s a simple fix but can drive you crazy if you don't know what you're looking for.
Step-by-Step Calibration Guide
Here's my no-nonsense, step-by-step process for getting your projector calibrated perfectly. This is the routine I wish I had when I first started.
Step 1: Physical Placement and Initial Setup
The absolute best way to start is by getting the projector as physically aligned as possible. Center the projector lens with the center of your screen horizontally, and try to get it at the correct height, too. Use a tape measure to get it precise. If you can do this, you’ll barely need to make any digital adjustments later. It might take some time to get the mount or shelf just right, but it's worth the effort.
Step 2: Adjust Zoom and Focus
Once your projector is mounted, turn it on and project an image. A simple grid or test pattern from your simulator software is great for this. Use the zoom function to get the image roughly to the size of your screen, then use the focus ring to make the image sharp. Don’t obsess over the edges yet; just get the center clear.
Step 3: Utilize Lens Shift (if available)
If your projector has lens shift, this is your next step. Use the lens shift dials or controls to move the image left, right, up, and down until it fills the screen perfectly. You'll see the image move without any distortion. This is the ideal way to get your final alignment.
Step 4: Use Keystoning (if necessary)
If your projector doesn’t have lens shift, or if you still have a slight trapezoidal shape after using it, it's time to use keystone correction. Go into the projector's menu and find the keystone settings. Adjust the horizontal and vertical keystone sliders until the image forms a perfect rectangle. Be gentle with these controls; a little goes a long way, and you don’t want to overdo it and soften the image too much.
Step 5: Fine-Tuning and Final Checks
Now, take a step back and look at the whole picture. Make sure the corners of the projected image are perfectly aligned with the corners of your screen. Check the aspect ratio again, and make sure everything looks natural and not stretched. This is also a good time to adjust the brightness and contrast settings to make the image pop.
Troubleshooting Common Issues
Sometimes things go wrong, even with the best plans. Don't worry, here are a couple of problems and their solutions:
The image is blurry on one side but not the other: This is usually a focus issue. Sometimes the screen isn't perfectly flat, or the projector is slightly misaligned. Double-check your focus settings and make sure the projector is aimed directly at the center of the screen.
The image has a visible trapezoid shape even with keystone correction: This could mean your projector is positioned at a very extreme angle. Keystoning has its limits. The best solution is to go back to Step 1 and try to physically reposition the projector.
The image is too big or too small: Use the zoom function. If you're at the limits of the zoom and it still doesn't fit, you might need to move the projector closer or further away from the screen.
Conclusion
I hope this guide has demystified the process of calibrating your golf simulator projector for you. It’s a bit of a process, I know, but once you get it right, you’ll have a simulator that feels professional and truly immersive. Proper calibration, utilizing adjustments like keystone correction and lens shift, is the key to a sharp, perfectly aligned image. Taking the time to get this right will pay off every time you step up to the virtual tee. So, go ahead and give it a shot. And when you get that perfect image, drop a comment below and let me know how it went! I'd love to hear your experiences and any tips you've picked up along the way.


Comments