
DIY Golf Simulator Impact Screen Tensioning: The Complete Guide to Perfect Setup
- Hoza Mc.Ferdinand
- Jul 25, 2025
- 15 min read

I learned the hard way that rushing through impact screen tensioning is a recipe for disaster. After my first setup left me dodging golf balls like I was in a war zone, I realized proper tensioning isn't optional—it's essential for both performance and safety.
Whether you're a DIY enthusiast or just want to understand your simulator better, getting the tension right makes the difference between a professional-grade setup and an expensive mess. This guide covers everything from how impact screens work to step-by-step tensioning techniques that'll keep your screen performing like new for years.
Understanding How Impact Screens Work: The Foundation of Proper Tensioning

Before we dive into the nuts and bolts of impact screen tensioning, let's talk about what these screens actually do and why proper tension is so crucial. I used to think impact screens were just fancy bed sheets, but boy was I wrong about that assumption.
The Science Behind Impact Screen Performance
Impact screens are engineered pieces of equipment designed to absorb the kinetic energy from golf balls traveling at speeds up to 200+ mph. When a golf ball hits a properly tensioned screen, several things happen simultaneously. The screen material flexes to absorb the impact, the tension distributes the force across the entire surface area, and the ball's energy is converted from forward momentum into a controlled bounce-back.
The key here is that controlled bounce-back. With proper impact screen tensioning, your ball should hit the screen and drop straight down with minimal forward momentum. This happens because the tension creates what engineers call "energy dissipation through elastic deformation." Basically, the screen stretches slightly on impact, absorbs most of the ball's energy, then returns to its original shape.
When I first started experimenting with different tension levels, I noticed something fascinating. Screens that were too loose would create a "trampoline effect" where balls bounced back aggressively toward the hitting area. On the flip side, screens that were over-tensioned created hard impacts that felt completely unnatural and stressed the material at mounting points.
Material Properties and Why They Matter
Most quality impact screens are made from specialized polyester or vinyl materials with reinforced edges. These materials have specific elastic properties that determine how they respond to tension and impact. The weave pattern and thread count affect durability and stretch characteristics, while material coating influences surface texture and ball response. Edge reinforcement is critical for preventing tears at mounting points, and material thickness determines how much tension the screen can handle.
Different screen materials require different tensioning approaches. Heavy-duty vinyl screens can handle more tension than lighter polyester materials, but they also require more force to achieve proper tension. I've worked with screens ranging from 12-ounce vinyl to 16-ounce marine-grade materials, and each has its own sweet spot for optimal impact screen tensioning. T
he ambient temperature also affects material properties significantly—cold materials become stiffer and require less tension, while hot materials become more pliable and may need additional tension to maintain proper performance.
Why Proper Tensioning Matters for Safety and Performance
After dealing with my fair share of poorly tensioned screens, I can tell you that the consequences go way beyond just aesthetics. Loose screens create unpredictable ball bounces that can be genuinely dangerous. I once had a 7-iron shot bounce back and nearly take out my ceiling fan because the screen was sagging in the middle.
Proper impact screen tensioning ensures consistent ball response across the entire hitting surface. When you strike a ball into a well-tensioned screen, it should behave the same whether you hit dead center or slightly off to one side. This consistency is crucial for getting accurate feedback from your launch monitor and building muscle memory that translates to the real course.
From a longevity perspective, correct tension distributes stress evenly across the screen material. Screens that are too loose develop weak spots where the material flexes excessively with each impact. Screens that are over-tensioned face a different problem—the excessive stress concentrates at mounting points, leading to grommet failures or tears at the screen edges.
How to Properly Tension an Impact Screen: The Complete Step-by-Step Process
Alright, let's get into the meat and potatoes of impact screen tensioning. This is where theory meets practice, and I'm going to share the exact process I've refined over years of setting up screens for myself, friends, and even a few local golf shops.
Step 1: Gather Essential Tools and Materials

Before you start, gather these tools because trust me, trying to hunt for equipment halfway through the process is incredibly frustrating:
Essential Tools:
Measuring tape (25-foot minimum)
4-foot level
Complete socket wrench set
Torque wrench (for consistent bolt tension)
Rubber mallet
Safety glasses and work gloves
Specialized Equipment (Recommended):
Tension gauge ($200-300, worth it for professional results)
Extra bungee cords and tensioning straps
Marine-grade stainless steel mounting hardware
Don't cheap out on mounting hardware. I exclusively use marine-grade stainless steel now after learning this lesson through several expensive failures with cheap grommets and eyelets.
Step 2: Pre-Installation Planning and Critical Measurements
The key to successful impact screen tensioning starts before you even unpack the screen. Here's my systematic approach:
Check your frame for square and level - Use a 4-foot level and measure diagonals to ensure your frame is truly rectangular. Even small irregularities will create impossible-to-solve tensioning problems later.
Plan mounting point spacing - I typically use mounting points every 6-8 inches around the perimeter. Heavier screens need closer mounting points to properly distribute load.
Mark mounting points precisely - Double-check your measurements before drilling or installing hardware. Account for screen material thickness when planning mounting points.
Do a dry run - Test fit with just the mounting hardware before installing the actual screen. This lets you identify issues without risking damage to an expensive screen.
Plan your tensioning sequence - Map out a numbered system for each mounting point and follow a predetermined pattern that ensures balanced loading.
Step 3: Understanding Your Mounting System
Your impact screen tensioning approach needs to match your specific hardware setup, and this is where many DIY installers make critical mistakes. Each mounting system has unique characteristics that directly affect how you approach the tensioning process.
1. Grommet-Based Systems (Most Common for DIY)
Grommet-based systems are the most popular choice for DIY installations because they're relatively straightforward and forgiving for beginners. These systems use reinforced holes in the screen material that accept hooks, carabiners, or direct bolt mounting. The main advantage is easy adjustment and replacement, but they concentrate stress at specific points around the screen perimeter.
When working with grommets, you need to pay special attention to load distribution because all the tension forces are focused on these small reinforced areas. Here's what makes grommet systems succeed or fail:
Hardware quality is critical - Cheap grommets will tear out under proper tension
Spacing must be consistent - Uneven spacing creates stress concentrations
Installation sequence matters - Follow cross-pattern tensioning religiously
Load limits exist - Each grommet has maximum safe tension limits
I've seen screens fail catastrophically when grommets tear out under excessive tension, so it's crucial to use marine-grade hardware and follow proper tensioning sequences.
2. Track-Mounted Systems (Professional Results)
Track-mounted systems offer the most professional results but require more precise installation. The screen edge slides into a continuous track system similar to what you'd find on an RV awning. This provides excellent edge support and distributes tension forces evenly along the entire perimeter rather than concentrating them at specific points.
The trade-off is higher cost and more complex installation requirements. With track systems, you adjust overall track tension rather than individual mounting points, which can make fine-tuning easier once you understand the system. However, if your track isn't perfectly straight and level, you'll have persistent tension problems that are difficult to solve.
3. Bungee Cord Systems (Budget Option with Limitations)
Bungee cord systems are popular for budget installations, but they require special considerations during tensioning. The elastic nature of bungee cords means you need to account for stretch and recovery in your tension calculations. What feels like proper tension when you first install it may become loose as the bungees stretch over time.
Key considerations for bungee systems:
Expect ongoing adjustments - Bungees stretch and lose tension over time
Use high-quality bungees only - Cheap ones fail quickly under golf ball impacts
Not suitable for heavy use - Can't provide consistent tension for serious practice
Good for temporary setups - Useful while planning permanent installation
I generally don't recommend bungee systems for high-impact installations because they can't provide the consistent tension needed for optimal ball response.
Step 4: The Actual Tensioning Process
Now for the critical tensioning process, which is where most people either achieve professional results or create expensive problems. This process requires patience and systematic approach rushing through it almost guarantees poor results.
Initial loose attachment phase - Begin by attaching the screen at ALL mounting points around the perimeter, but use just enough tension to hold the screen in position. This is critical because many people make the mistake of starting to tighten sections before the entire screen is mounted. The screen material should have visible slack at this stage, and you should be able to push the material in several inches with light hand pressure. This loose mounting allows the screen to find its natural position and prevents pre-stressing that can lead to uneven tension later.

Establish the cross pattern sequence - Begin tensioning at opposite corners using a cross pattern similar to tightening lug nuts on a car wheel. Start with the top-left corner and apply modest tension not full tension yet. Move immediately to the bottom-right corner and apply similar tension. Then proceed to the top-right corner, followed by the bottom-left corner. This cross pattern ensures that tension forces are balanced as you work around the perimeter. Continue this pattern, working from corners toward the middle sections of each side. The key is maintaining the cross pattern throughout the entire process.
Execute multiple progressive passes - Here's where patience pays off. Do 4-5 complete circuits around the entire screen, gradually increasing tension with each pass. On the first pass, apply about 25% of your target tension. Second pass, increase to 50%. Third pass brings you to 75%, and the fourth pass achieves full tension. Never tighten one point to final tension before balancing the rest of the screen. I learned this lesson painfully when my first screen developed permanent wrinkles because I over-tensioned one side before completing the cross pattern.
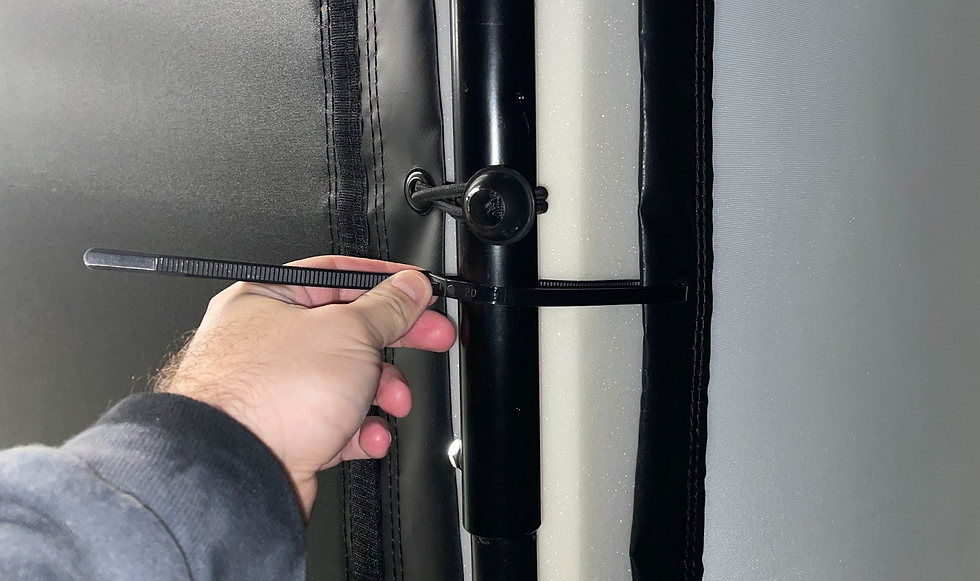
Notice the bolt on the image , that is where you need to use your wrench and tighten your screen following the instructions in this guide.
Monitor tension consistency throughout - As you work through each pass, pay attention to how the screen responds. The material should feel increasingly firm but never drum-tight. Use the "guitar string test" by plucking the screen material with your finger—it should produce a low musical tone, not a high-pitched ping or no sound at all. If you hear a ping, you're approaching over-tension territory. If there's no musical tone, you need more tension. The tone should be consistent across different areas of the screen as you complete each pass.
Validate with systematic bounce testing - Once you've completed your tensioning passes, perform systematic testing using a golf ball dropped from exactly shoulder height (approximately 4 feet) onto different areas of the screen. Start with the center, then test each corner, then the middle of each side. Consistent bounce patterns indicate proper tensioning. Balls should bounce to roughly the same height regardless of where they hit the screen. Areas that produce significantly higher or lower bounces indicate tension irregularities that need correction.

What's Doing the Work?
1. Tensioning Tools
Bungee cords or elastic straps: These stretch when pulled, then pull the screen back toward the frame as they try to return to their original length.
Ratchet straps: You crank a lever to incrementally apply tension.
Bolts and screws: When threaded through brackets or tensioning plates, turning them pulls the fabric tighter.
2. Screen Material
Most impact screens are made of tightly woven polyester or specialized mesh fabric.
This material resists tearing and stretches just enough to absorb energy, but it needs even tension to stay flat.
How Tightening Happens
Anchoring: You secure each attachment point loosely to begin.
Force Application: Using your chosen tools (straps, bolts), you begin applying force, pulling the screen toward the frame.
Cross Pattern Balancing: By working in opposing corners, forces are distributed evenly.
Elastic Recoil or Mechanical Locking: Straps pull back naturally, bolts lock mechanically into place, which holds the tension
Step 5: Fine-Tuning and Professional-Level Adjustments
After your initial tensioning, it's time for the critical fine-tuning phase:
Visual inspection - Step back and examine the entire screen surface. You should see no visible wrinkles, sag areas, or stress lines.
Systematic testing - Test different areas of the screen with a golf ball dropped from exactly 4 feet high at 12 different points. Consistent bounces across all test points indicate proper tensioning.
Impact mapping - Hit practice balls (foam or rubber) into different areas while paying attention to ball reaction. Balls should drop straight down with minimal bounce-back energy.
Make micro-adjustments - Don't be afraid to make small tweaks. I typically go through 2-3 adjustment cycles before I'm completely satisfied.
Document your settings - Note final positions or tensions so you can return to these settings if you need to remove and reinstall the screen later.
Optimal Distance: How Far Should Your Impact Screen Be From Your Golf Simulator
Getting the distance right between your hitting area and impact screen is crucial for both safety and realism. This is another area where I made some expensive mistakes early on.
Standard Distance Recommendations
For most home golf simulator setups, the optimal distance between your hitting position and the impact screen is 8-12 feet minimum, with 10-12 feet being ideal. This might seem like a lot if you're working with limited space, but closer isn't better when it comes to impact screen placement.
The 8-12 foot range serves several critical purposes that directly relate to impact screen tensioning effectiveness. First, it gives the golf ball enough flight time to reach stable trajectory before impact, which ensures consistent stress patterns on your screen. Second, this distance provides a crucial safety buffer for errant shots that might ricochet dangerously in shorter spaces. Third, it allows proper energy transfer that mimics real driving range conditions, making your practice more realistic. Finally, the additional distance helps manage impact noise, which becomes important when you're practicing regularly.
I learned this lesson when I initially set up my screen only 6 feet from my hitting mat. The ball impacts felt harsh and unnatural, the screen developed stress points quickly despite proper tensioning, and I had several close calls with balls bouncing back with surprising speed and energy.
Factors That Affect Your Specific Distance
Your optimal distance depends on several key factors that go beyond basic safety considerations. Ceiling height plays a major role in determining practical distances—if you're dealing with an 8-foot ceiling, you might need to compromise on distance to avoid hitting the ceiling on your backswing. However, never go below 8 feet if you can possibly avoid it, as the safety and performance compromises simply aren't worth the risk.
Club selection significantly impacts distance requirements. If you're primarily working on short iron shots and wedges, you can potentially work with distances in the 8-9 foot range. But if you want to practice driver shots—and most people do—you really need that full 10-12 feet or more. Driver shots create significantly more impact energy and need additional space to develop proper trajectory before hitting your screen.
Launch monitor requirements add another layer of complexity to distance planning. SkyTrak units need 6-8 feet of clearance behind the ball for proper operation, which means your screen needs to be 12-15 feet from your hitting position for optimal performance. Photometric systems require clear sight lines between the monitor, ball, and screen, while overhead systems need complex positioning calculations for accurate tracking. I made the mistake of setting up my screen first and trying to fit the launch monitor afterward, which resulted in compromised positioning that affected both accuracy and safety.
Space Constraint Solutions
If you're genuinely constrained by space and can't achieve the ideal distance, there are some workarounds, though they all involve performance compromises that you need to understand fully. Using softer practice balls like foam or rubber alternatives can reduce impact energy significantly, allowing you to practice with shorter distances while maintaining reasonable safety margins. However, this approach affects the realism of your practice sessions and may not provide the feedback you need for serious game improvement.
Installing additional padding behind your impact screen can help absorb energy and reduce bounce-back effects. This doesn't eliminate the need for proper impact screen tensioning, but it can help mitigate some issues caused by shorter distances. I've seen installations where people mounted heavy foam padding or even old mattresses behind their screens to create additional energy absorption. Another option is limiting your club selection to irons and wedges only, since driver and fairway wood shots simply create too much energy for safe short-distance installations.
Never angle your screen to deflect balls downward as a solution to space constraints. This creates uneven tension distribution that can lead to premature failure, and the angle needs to be quite steep to be effective, which affects the visual appearance and functionality of your simulator setup.
Impact Screen Lifespan: How Long Does an Impact Screen Last

This is probably the question I get asked most often. The answer depends on usage patterns, maintenance quality, and most importantly, proper impact screen tensioning.
Realistic Lifespan Expectations
Here's what you can realistically expect based on different usage patterns and maintenance quality:
1. Light Recreational Use (2-3 sessions/week, 50-100 balls)
Quality screen with proper impact screen tensioning: 3-5 years
With excellent maintenance: Can exceed 5 years
Poor tensioning/maintenance: 12-18 months
2. Moderate Use (daily practice, 100-200 balls/day)
Typical lifespan: 18-36 months
Heavy driver practice reduces this significantly
Mixed iron/wedge work extends lifespan
3. Heavy Daily Use (200+ balls/day, multiple users)
Best screens show wear within 12-18 months
Commercial installations replace every 6-12 months
Material not designed for this abuse level
Ball Type Impact on Longevity: Standard golf balls in good condition have minimal impact on screen life, while range balls or scuffed balls can reduce lifespan by 30-50% due to their harder construction and damaged surfaces. Always inspect practice balls regularly and retire any showing cuts, scuffs, or damage.
Early Warning Signs Your Screen Needs Attention
Knowing when to replace your impact screen is crucial for safety, and there are both obvious and subtle indicators to watch for. Obvious visual damage includes tears, holes, or areas where the material has worn visibly thin. However, there are much subtler signs that many people miss until problems become serious.
Performance changes often indicate developing problems before visual damage becomes apparent. Pay close attention to how balls respond to impacts across different areas of your screen—if you notice increasing amounts of bounce-back energy or inconsistent ball behavior across the screen surface, the material may be losing its elasticity. This degradation happens gradually over thousands of impacts, so it's easy to miss unless you're specifically monitoring for it.
Changes in impact sound can also indicate developing issues. Fresh, properly tensioned screens produce a distinctive soft "thud" when hit with golf balls. As screens age and lose elasticity, this sound becomes sharper and more pronounced. If you notice the impact sound becoming harsher or more metallic, it's time to investigate further.
Tensioning problems often precede visible damage and shouldn't be ignored. If you find yourself constantly re-tensioning the screen or if certain areas won't hold tension properly, the mounting points or material may be failing. This is often a precursor to more serious failures, so persistent tensioning issues deserve immediate attention. Visual inspection under good lighting can reveal stress lines, areas of discoloration, or sections where the material appears stretched or distorted before they become dangerous.
Extending Screen Life Through Proper Maintenance
Proper impact screen tensioning is actually preventive maintenance that significantly extends screen life. Here's my maintenance routine:
Monthly Maintenance (Heavy Users) / Quarterly (Light Users):
Visual inspection for wear signs
Tension check using bounce test or tension gauge
Clean screen surface with dry cloth
Check mounting hardware for looseness or damage
Best Practices for Longevity:
Rotate hitting patterns to distribute wear evenly
Use only golf balls in excellent condition
Protect screen from extreme temperatures and UV exposure
Address tension issues immediately—don't let them develop
Environmental Protection:
Keep screen dry when not in use
Avoid direct sunlight exposure (causes UV degradation)
Maintain stable temperature and humidity when possible
Consider climate control for garage/basement installations
When to Consider Professional Replacement
While most people can handle basic maintenance, professional replacement makes sense in certain situations:
Screen shows significant wear but frame is still excellent
You've had persistent DIY tensioning problems
You want access to commercial-grade screen materials
Time constraints make professional installation more economical
However, don't assume professional installation eliminates maintenance needs. Even professionally installed screens require regular tension checks and adjustments.
Advanced Troubleshooting and Common Problems

After years of working with different screen setups, I've encountered virtually every impact screen tensioning problem imaginable. Here are solutions to the most common issues.
Dealing with Persistent Uneven Tension
Uneven tension is the most frustrating problem because it's often caused by issues beyond simple adjustment errors:
Common Causes:
Frame not square or level
Inconsistent mounting point spacing
Defective mounting hardware
Material defects or variations
Systematic Solution Process:
Tension mapping - Check tension at grid points across entire screen
Frame verification - Recheck square, level, and mounting point alignment
Hardware inspection - Look for bent grommets, misaligned hardware
Progressive adjustment - Make small incremental changes while monitoring entire surface
If problems persist after systematic troubleshooting, you likely have frame or hardware issues that need correction before proper tensioning is possible.
Seasonal Adjustment Needs
Screen materials respond to temperature and humidity changes more than most people realize:
Spring/Summer (Warming, Increasing Humidity):
Materials expand and soften
Usually need to increase tension
Check monthly during transition periods
Fall/Winter (Cooling, Decreasing Humidity):
Materials contract and stiffen
May need to reduce tension to prevent over-stress
Pay attention to heated vs. unheated spaces
I track environmental conditions and screen performance throughout the year to develop adjustment schedules tailored to my specific installation.
Complex Installation Problems
Some problems require systematic diagnostic approaches:
Screens That Develop Issues Over Time:
Often caused by gradually failing hardware
Use temporary over-tensioning to identify weak points
May indicate manufacturing defects becoming apparent
Area-Specific Performance Problems:
Despite even tensioning, some areas behave differently
Usually material property variations or hidden hardware issues
Requires systematic impact testing to identify and address
Environmental Interference:
Air currents, vibration, or acoustic effects
Can influence screen behavior in non-obvious ways
May require creative problem-solving approaches
Conclusion:
Mastering Impact Screen Tensioning for Long-Term Success
Proper impact screen tensioning isn't just a one-time setup task—it's an ongoing skill that directly impacts your simulator's performance, safety, and longevity. The techniques I've shared here represent lessons learned through countless hours of setup, adjustment, and maintenance.
The key takeaways for successful impact screen tensioning are systematic approach, proper tools, and patience during the setup process. Whether you're building your first simulator or upgrading an existing setup, remember that taking time to understand your screen material and plan your installation carefully will save you time, money, and frustration down the road.
Don't be discouraged if your first tensioning attempt isn't perfect—this is definitely a skill that improves with practice. Start with the basic techniques I've outlined, pay attention to how your screen responds, and make incremental adjustments based on actual performance rather than assumptions.
Most importantly, prioritize safety throughout the process. A properly tensioned impact screen should enhance your golf practice experience, not create hazards or frustration. If you're ever unsure about your setup, don't hesitate to consult with experienced installers or take a break to research specific issues.
Your golf simulator represents a significant investment in your game improvement journey. Taking the time to master impact screen tensioning ensures that investment continues paying dividends for years to come. Now get out there and start practicing—your lower scores are waiting!
e


Comments