
Ultimate Guide to Building Your Own DIY Golf Simulator( Garage, Indoors, etc...)
- Hoza Mc.Ferdinand
- Jul 30, 2025
- 13 min read

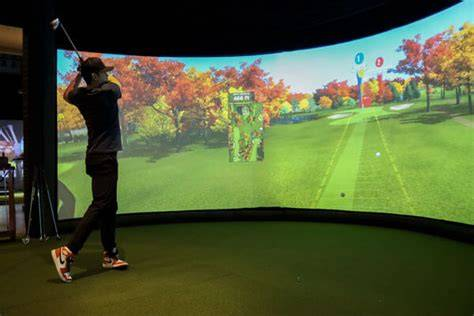
Three years ago, I stood in my garage staring at what looked like the world's most expensive pile of electronic junk. My "simple" golf simulator project had spiraled into a nightmare of incompatible components, tangled cables, and a projector that made everything look like it was filmed through a dirty windshield.
This guide will walk you through every component you need, from budget-friendly options that deliver solid performance to premium choices that'll make your buddies think you've lost your mind (in the best way possible). More importantly, I'll share the mistakes that cost me time and money so you can avoid them entirely.
Table of Contents
1. Planning Your DIY Golf Simulator Space
Before you buy a single component, you need to nail down your space requirements. I learned this lesson the hard way when I ordered a 12-foot impact screen for what turned out to be an 11-foot garage. That was an expensive measuring mistake that took weeks to sort out.
Space Requirements and Dimensions
The minimum space you'll need is significantly larger than most people expect. For a right-handed golfer, you need at least 10 feet of width, 10 feet of depth, and 9 feet of height. That's the absolute bare minimum - I'd strongly recommend 12 feet width, 15 feet depth, and 10 feet height if you want to swing comfortably without constantly worrying about hitting something.
Left-handed golfers need to flip these measurements, and if you're planning for both, you'll need even more space. The ceiling height is crucial because wedge shots can easily reach 8-9 feet, and you don't want to be constantly adjusting your swing to avoid the ceiling.
I made the mistake of setting up in a space that was technically big enough but felt cramped. It affected my swing confidence and made the whole experience less enjoyable. Trust me, a slightly smaller screen in a comfortable space beats a larger screen where you're constantly worried about clearance.
Environmental Considerations
Temperature and humidity control matter more than you might think. Electronic components don't like extreme temperature swings, and hitting mats can become dangerously slippery in humid conditions. My garage setup required a dehumidifier because condensation was affecting both the projector and the electronics.
Lighting control is absolutely critical for projector performance. You need the ability to darken the space significantly during play, but also have adequate lighting for setup and maintenance. I installed blackout curtains and dimmable LED strips, which gave me complete control over the lighting environment.
Sound isolation might be important depending on your living situation. Golf ball impacts and club strikes can be surprisingly loud, especially late at night. Adding some basic sound dampening materials saved my marriage and my relationship with the neighbors.
Power and Technology Infrastructure
Plan your electrical needs carefully. Between the projector, launch monitor, computer, sound system, and lighting, you'll likely need multiple dedicated circuits. I had to have an electrician add two new 20-amp circuits to handle everything safely.
Network connectivity is often overlooked but essential. Most modern launch monitors and software require reliable internet connections for updates, course downloads, and online play. Running ethernet cable to your simulator space is worth the extra effort for stable connectivity.
Consider future expansion when planning your infrastructure. What starts as a basic setup often grows into something more elaborate. Running extra conduit and cable during initial construction saves massive headaches later.
Essential Components Overview
A golf simulator is really a collection of specialized components that must work together seamlessly. Understanding what each component does and how it interacts with the others is crucial for building a system that actually works well.
The Five Core Components
Every functional golf simulator needs these five essential elements, and skimping on any one of them will compromise your entire system. I've seen people spend $3000 on a launch monitor only to pair it with a $200 projector that makes the experience miserable.
i. Launch Monitors - The Brain of Your System
The launch monitor serves as the brain of your system, tracking ball flight and club data with remarkable precision. It determines crucial metrics like swing speed, ball speed, launch angle, spin rate, and calculates where your ball would land on a real course. This critical component transforms your physical swing into digital data that creates the virtual golf experience. After extensive testing of different models, the differences in accuracy, features, and usability are dramatic and directly impact your simulator's performance.
The budget option is the Garmin Approach R10 ($600-700), which provides basic accuracy that's perfectly adequate for recreational golfers. This portable unit strikes an excellent balance between affordability and performance, tracking ball speed, carry distance, and spin rate with impressive consistency for its price point. Setup takes just minutes, and the built-in software offers entertaining practice modes, though it does struggle with short shots under 30 yards and lacks the precision of higher-end units.
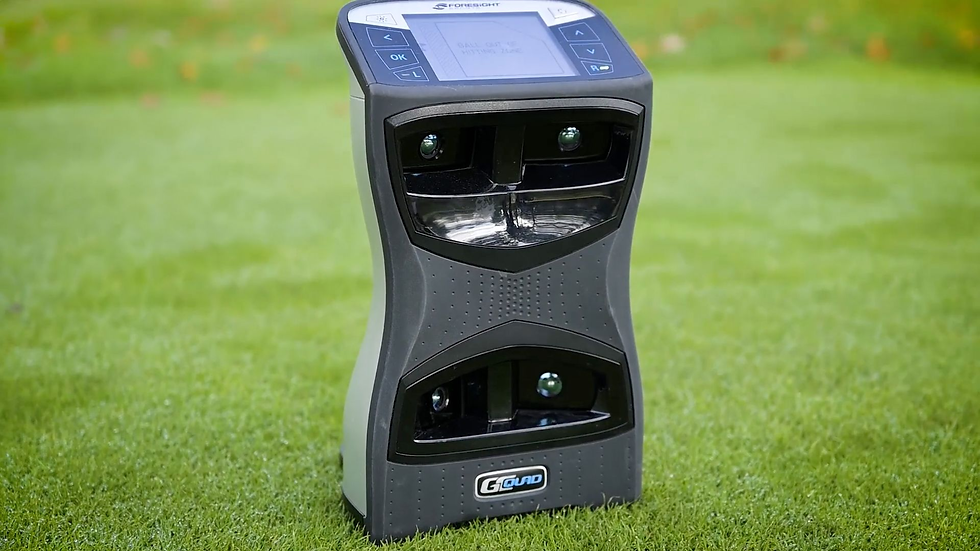
For those seeking professional-grade performance, the Foresight Sports GCQuad ($14,000-16,000) offers tour-level precision that rivals equipment used at PGA events. Every metric from ball speed to club path is measured with exceptional accuracy, providing data quality that transforms your simulator from entertainment into a genuine training tool. Single-digit handicap golfers have reported dropping 2-3 strokes after focused practice on GCQuad-equipped systems.
The recommended middle ground is the SkyTrak Plus ($2,000-2,500), which provides excellent value with approximately 80% of premium system accuracy at one-third the cost. Its photometric technology delivers ball speed accuracy within 1% and consistently reliable distance measurements, while the strong software ecosystem includes access to premium courses that keep the experience engaging over time.
ii. Projectors - Creating Your Visual Environment
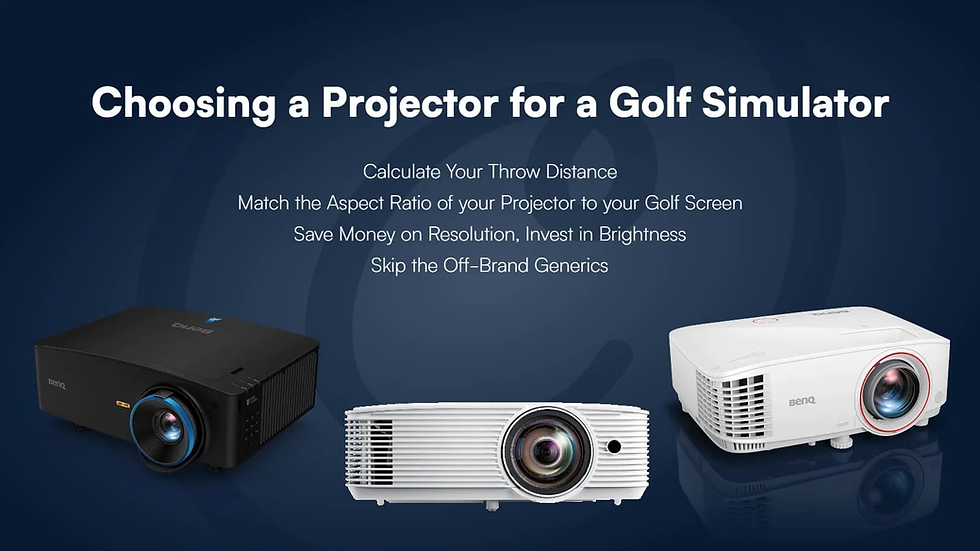
Projectors create the visual environment where you'll see golf courses and receive feedback, with the projector quality directly affecting how immersive and enjoyable your simulator experience becomes. These systems are essential for visual display quality, as they affect every minute you spend in your simulator. Golf simulators require specialized projection systems rather than basic home theater projectors due to the demanding requirements of tracking fast-moving balls and displaying detailed course graphics.
The BenQ TH671ST ($800-1,000) works exceptionally well for budget builds, featuring a short-throw design perfect for smaller spaces and 3,000 lumens brightness that performs well in partially lit rooms. This Full HD projector offers crisp image quality with good color accuracy, representing the entry point for serious simulator builders who want quality without premium pricing, though it does have resolution limitations compared to 4K options.
The premium choice is the Epson Pro L1100U ($4,000-5,500), offering superior brightness at 6,000 lumens, 4K enhancement that makes course details incredibly sharp, and virtually silent operation perfect for home environments. The laser light source eliminates bulb replacements for years while delivering exceptional color accuracy and contrast. This projector completely transforms the visual experience, making course textures look remarkably realistic and ball tracking crystal clear.
iii. Impact Screens - Safety and Projection Surface

Impact screens safely stop golf balls while providing a projection surface, serving the dual purpose of protection and visual display. They need to handle repeated impacts while maintaining image quality and structural integrity, making them crucial for both safety and visual quality during every session. The screen material and construction directly affects both the safety of your setup and the clarity of your projected golf courses.
Basic Cimarron screens ($250-350) provide adequate safety and function with their commercial-grade polyester construction and reinforced grommets. These screens offer solid value for recreational users, with straightforward installation using basic tools and proven durability over extended use. While the image quality is adequate for casual play, they do require more frequent tension adjustments than premium alternatives.
Carl's Place Premium screens ($600-1,200) offer superior image quality and durability through their multi-layer construction and professional mounting hardware. These screens provide vibrant, sharp colors even with ambient lighting, substantial feel without excessive stiffness, and satisfying ball impact feedback. The immediate performance difference over budget alternatives justifies the higher investment, especially for simulators that will see regular use.
iv. Hitting Mats - Realistic Surface Feedback

Hitting mats serve as the surface you'll hit from, which needs to provide realistic feedback while protecting your joints during extended practice sessions. These mats significantly affect comfort and shot realism, influencing every shot you take and your physical comfort during long training sessions. The surface quality also impacts launch monitor data accuracy, making proper selection crucial for optimal performance and long-term enjoyment.
Budget Rukket Tri-Turf mats ($150-250) offer multiple surface types that simulate fairway, rough, and tee conditions, providing useful feedback about how different lies affect your shots. These portable mats require no permanent floor modifications and offer easy storage when your space serves multiple purposes, though the feel isn't quite as realistic as premium options and may require anchoring during aggressive swings.
Premium TrueStrike mats ($800-1,200) provide gel-filled technology that closely simulates real turf interaction with remarkable realism. The gel-filled divot simulation creates an authentic feel that's significantly easier on joints during extended practice sessions, while accepting real wooden tees for added authenticity. This professional-grade construction transforms practice sessions with genuine feedback that can actually improve your on-course performance.
v. Software - Turning Data Into Golf Experience
Golf simulation software is the program that combines data from your launch monitor with course graphics and gameplay options, turning raw swing data into an actual golf experience. This software transforms launch monitor measurements into playable golf scenarios, with significant differences in course quality, realism, and features between platforms that can influence which launch monitor you should choose for your setup.
E6 Connect ($300-500 annually) provides good entry-level simulation without premium pricing, offering extensive course selection including famous layouts and well-designed practice modes for skill development. The graphics quality is solid and entertaining enough to encourage regular use, with reasonable system requirements that work with standard computers. However, the subscription costs do accumulate over time and graphics quality falls below premium alternatives.
TGC 2019 with Course Forge ($40 plus courses) delivers stunning graphics and unlimited course availability through its remarkable community-created content. The Course Forge community has created thousands of accurate recreations of virtually every famous course, with genuinely impressive graphics quality and realistic physics that create true immersion. While it requires a dedicated gaming computer for optimal performance, the visual quality and realism justify the additional hardware investment for serious golf enthusiasts.
vi. Additional Considerations
The guide emphasizes the critical importance of proper installation and safety considerations, including the necessity of enclosures and netting systems to contain mishits and create a safe playing environment. Side netting using heavy-duty materials rated for golf ball impacts is essential, as even the best players experience mishits that can send balls at dangerous speeds.
Audio and lighting systems, while often considered afterthoughts, dramatically affect the immersion and usability of your simulator setup. Quality audio creates realistic sound effects that enhance the golf experience, while proper lighting control allows optimal projector performance during play while maintaining adequate illumination for setup and safety. Smart lighting controls with programmed presets for different activities can significantly improve the overall user experience.
Each component significantly impacts the overall simulator quality and user experience, with the key to successful simulator building lying in understanding how these elements work together to create a cohesive, enjoyable system that will provide years of entertainment and improvement.
Installation and Setup Process
The installation process can make or break your simulator project. I've learned that taking time to plan and execute each step carefully prevents expensive mistakes and ensures everything works together properly.
Phase 1: Infrastructure Preparation
Start with electrical and network infrastructure before installing any golf-specific components. This foundational work affects everything else and is much easier to complete before equipment installation begins.
Power requirements planning:
Calculate total electrical load - Add up power requirements for all components plus 20% safety margin
Install dedicated circuits - Avoid sharing circuits with other high-load devices
Plan outlet locations - Position outlets conveniently but safely away from play areas
Include surge protection - Protect expensive electronics with quality surge suppressors
Network connectivity setup ensures reliable internet access for software updates, course downloads, and online play features. Wired ethernet connections are strongly preferred over wireless for stability and speed.
Phase 2: Mounting and Positioning
Component mounting and positioning requires careful measurement and planning. The relationships between launch monitor, projector, screen, and hitting area are geometrically complex and affect system performance significantly.
Installation sequence that works:
Install screen mounting system - This establishes the reference point for all other components
Position launch monitor - Follow manufacturer specifications exactly for optimal accuracy
Mount projector - Calculate position based on screen size and throw ratio requirements
Install hitting mat - Ensure proper positioning relative to launch monitor specifications
Take time to double-check all measurements before final installation. Moving components after cable management and final setup is completed is exponentially more difficult than getting positions right initially.
Phase 3: Integration and Calibration
System integration involves connecting all components and ensuring they communicate properly. This phase reveals compatibility issues and integration challenges that weren't apparent during component selection.
Calibration process steps:
Launch monitor setup - Follow manufacturer calibration procedures precisely
Projector alignment - Adjust position and settings for optimal image quality
Software configuration - Input launch monitor settings and course preferences
System testing - Verify all components work together properly
Document all settings and configurations during calibration. You'll need this information for troubleshooting and future adjustments.
Troubleshooting Common Issues
Every simulator build encounters problems, and knowing how to diagnose and fix common issues saves time, money, and frustration. I've dealt with most problems multiple times and developed systematic approaches for resolution.
a. Launch Monitor Problems
Launch monitor accuracy issues are often environmental rather than equipment problems. Lighting conditions, setup positioning, and even ambient temperature can affect performance significantly.
Common issues and solutions: • Inconsistent readings - Check lighting conditions and ensure proper positioning relative to hitting area • No ball detection - Verify alignment settings and ensure adequate lighting for optical systems • Software connectivity problems - Check USB connections and driver installations
Environmental factors affect launch monitor performance more than most people realize. Fluorescent lighting can interfere with optical systems, and extreme temperatures can affect sensor accuracy.
b. Projector and Display Issues
Projector problems usually relate to positioning, calibration, or compatibility with other system components. Image quality issues often have simple solutions that don't require expensive repairs or replacements.
Troubleshooting approach:
Check physical connections - Verify all cables are properly seated and undamaged
Verify resolution settings - Ensure computer output matches projector capabilities
Assess image alignment - Check keystoning and focus adjustments
Review ambient lighting - Confirm room lighting doesn't interfere with image quality
Regular maintenance prevents many projector problems. Filter cleaning, lamp replacement (for non-laser projectors), and lens cleaning should be scheduled preventive maintenance tasks.
c. Software and Integration Challenges
Software problems often result from compatibility issues between components or incorrect configuration settings. Systematic troubleshooting approaches resolve most software-related issues efficiently.
Diagnostic steps that work: • Verify system requirements - Ensure computer hardware meets software specifications • Check launch monitor drivers - Update drivers and verify proper installation • Review software settings - Confirm launch monitor configuration matches manufacturer specifications • Test component communication - Verify data flow between launch monitor and software
Keep installation media and configuration notes for all software components. Reinstallation is sometimes the fastest solution for complex software problems.
Budget Planning and Cost Management
Building a quality golf simulator requires significant investment, but smart planning and phased construction can make the project manageable financially while ensuring you end up with a system you'll actually enjoy using.
a. Budget Breakdown by Component
Understanding how costs break down across different components helps prioritize spending and identify opportunities for savings without compromising essential functionality.
Typical cost distribution: • Launch Monitor - 40-60% of total budget • Projector - 15-25% of total budget• Impact Screen and Enclosure - 10-20% of total budget • Hitting Mat - 5-10% of total budget • Software and Computer - 10-15% of total budget
This distribution assumes you're building a serious simulator rather than a basic practice setup. Budget allocations can shift based on priorities, but the launch monitor typically represents the largest single expense.
b. Phased Construction Approach
Building your simulator in phases spreads costs over time and allows you to learn what features matter most before making final investments. I've seen this approach work well for multiple builders.
Recommended phase progression:
Phase 1 - Basic setup with budget launch monitor, adequate projector, and basic screen ($3,000-$5,000)
Phase 2 - Upgrade launch monitor or projector based on experience with initial setup ($2,000-$4,000)
Phase 3 - Premium components and advanced features based on usage patterns ($2,000-$6,000)
This approach prevents over-investing in features you might not use while ensuring you have a functional system from the beginning.
c. Money-Saving Strategies
Smart shopping and timing can significantly reduce total project costs without compromising quality. I've learned several strategies that consistently produce savings.
Effective cost reduction methods: • Buy during off-season - Golf equipment often goes on sale during winter months • Consider certified refurbished - Many manufacturers offer refurbished units with full warranties • Bundle purchases - Some retailers offer package deals that reduce total costs • DIY installation - Professional installation adds 20-30% to component costs
However, don't compromise on safety or core functionality to save money. Cheap mounting hardware or inadequate electrical work can create dangerous situations that cost far more to fix than doing it right initially.
Maintenance and Upgrades

A golf simulator requires regular maintenance to perform optimally and last for years. I've developed maintenance routines that keep my system running smoothly while identifying upgrade opportunities.
a. Regular Maintenance Schedule
Consistent maintenance prevents problems and extends component life significantly. Most maintenance tasks are simple but important for optimal performance.
Monthly maintenance tasks: • Clean impact screen - Remove ball marks and dust that affect image quality • Check mounting hardware - Verify all connections remain tight and secure • Update software - Install software updates and new course releases • Calibrate launch monitor - Verify accuracy and adjust settings if necessary
Seasonal maintenance includes more thorough inspections and adjustments. Temperature changes affect screen tension, electronic calibration, and mounting hardware expansion.
b. Upgrade Planning and Timing
Technology improvements and changing usage patterns create upgrade opportunities that can significantly enhance your simulator experience. Planning upgrades strategically maximizes value and minimizes disruption.
Common upgrade progression:
Software upgrades - Often provide immediate improvement with minimal cost
Launch monitor upgrades - Dramatically improve accuracy and available features
Projector upgrades - Enhance visual experience and image quality
Computer hardware - Enable better software performance and features
Monitor technology trends and product release cycles to time upgrades advantageously. New product releases often trigger price reductions on previous-generation equipment.
c. Performance Optimization
Regular system optimization maintains peak performance and identifies potential improvements. Small adjustments often produce noticeable improvements in accuracy and usability.
Optimization checklist: • Review launch monitor positioning - Ensure optimal placement hasn't shifted over time • Adjust screen tension - Maintain proper tension for image quality and ball interaction • Optimize computer performance - Regular maintenance keeps software running smoothly • Update calibration settings - Periodic recalibration maintains accuracy
Document all changes and their effects on system performance. This information guides future optimization efforts and helps identify the most effective improvements.
Conclusion
Building a DIY golf simulator has been one of the most rewarding projects I've ever tackled, though it definitely tested my patience and problem-solving skills more than I expected. The key to success isn't just buying the right components - it's understanding how they work together and taking the time to install and calibrate everything properly.
Essential Success Factors
Your simulator's success depends on getting these fundamentals right from the beginning:
• Proper space planning - Adequate room dimensions and environmental controls make everything else possible
• Component compatibility - Ensuring all pieces work together prevents expensive mistakes and frustrating limitations
• Quality installation - Taking time to install components correctly prevents problems and optimizes performance


Comments