
Ultimate Guide to DIY Golf Simulator Impact Screens
- Hoza Mc.Ferdinand
- Jul 30, 2025
- 17 min read

Last year, I made what I thought was going to be a simple purchase - a golf simulator impact screen for my garage setup. Boy, was I wrong! After three different screens, countless hours of research, and more than a few frustrating installation attempts, I finally figured out what actually works.
Here's a shocking statistic that caught my attention: a golf ball struck with a driver should bounce back 1 to 3 feet from the screen when properly tensioned. That simple measurement changed everything about how I approached my DIY setup. The difference between a mediocre simulator experience and an amazing one often comes down to getting your impact screen right.
I've spent the last two years testing different screens, talking to other golf enthusiasts, and learning from my mistakes. This guide covers everything I wish I'd known from the start - from choosing the right material to proper installation techniques that actually work. Whether you're building your first simulator or upgrading an existing one, you'll find practical advice based on real-world experience, not just theory.
Table of Contents
1. Understanding Golf Simulator Impact Screens

When I first started researching golf simulator screens, I honestly thought they were all pretty much the same. Just hang up some white fabric and you're good to go, right? That naive assumption cost me about $300 and several weeks of frustration.
What Makes Impact Screens Different
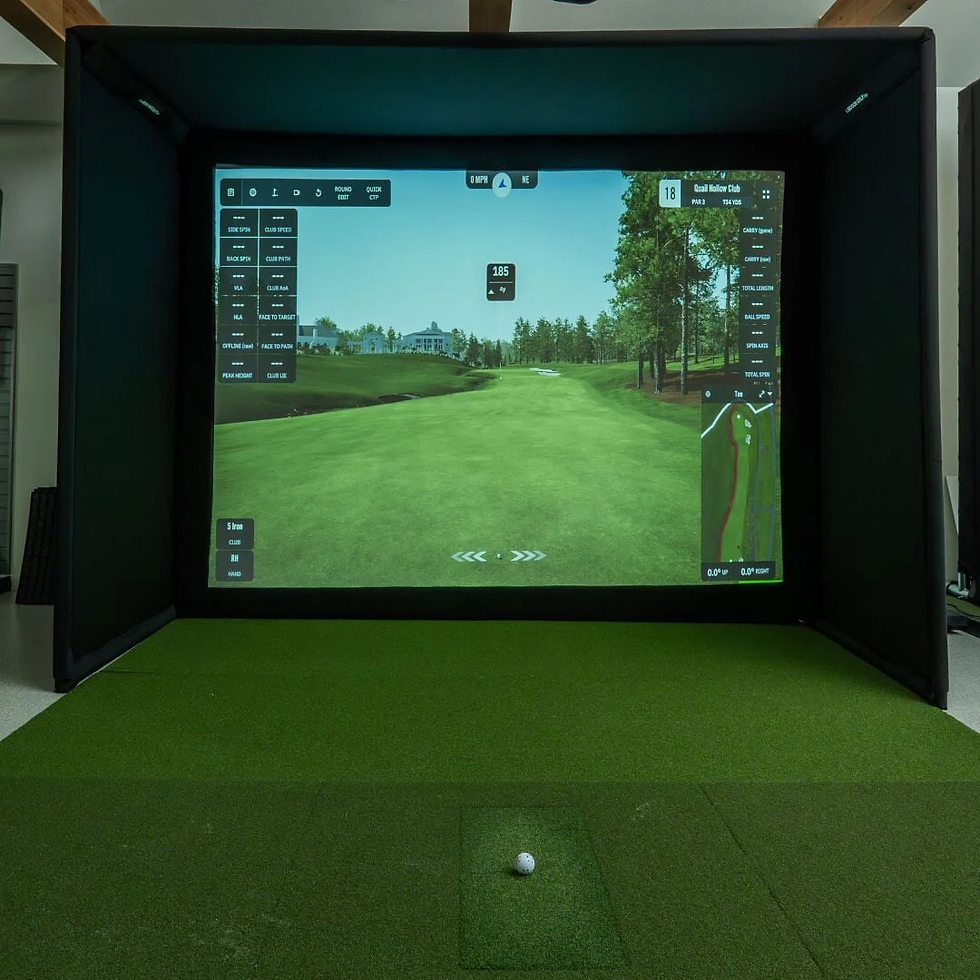
An impact screen serves two critical functions in your golf simulator setup. First, it acts as the projection surface where you'll see your virtual golf course, displaying crisp, clear images without hotspots or color distortion. Second, it must safely absorb the impact of golf balls traveling at speeds that can exceed 150 mph with driver shots.
The key difference between a regular projection screen and a golf impact screen lies in the construction materials and weave density. You'll find three main material options: polyester offers the most durability, nylon provides budget-friendly performance, and spandex delivers the most forgiving impact characteristics.
Regular projection screens simply can't handle repeated golf ball impacts. I learned this lesson the hard way when I tried using a cheap outdoor movie screen for my first setup. After about fifty swings, it looked like Swiss cheese! The holes weren't just unsightly - they completely ruined the projection quality and made the screen unsafe to use.
Essential Screen Features
When evaluating impact screens, several critical features separate the good from the great. The weave density determines both image quality and durability - tighter weaves provide better image quality but might be more prone to damage from mishit balls, while looser weaves are more forgiving but can create a grainy image appearance.
The backing material makes a huge difference in performance. Some screens use foam backing, others rely on special coatings, and premium options feature multiple layers. I've found that screens with proper backing material not only last longer but also provide better ball return characteristics.
Size Requirements Matter
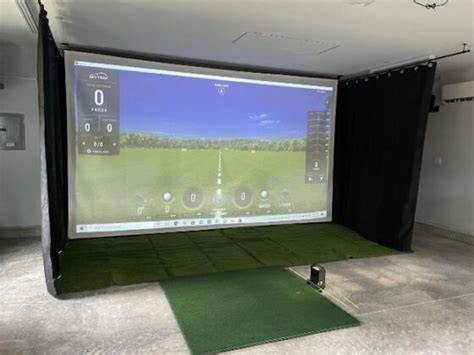
Size considerations go beyond just fitting your space. Your screen height should be at least 8.5-9 feet, with 10 feet being ideal. Any golf impact screen less than 8 feet high can be too short to catch wedge shots. I learned this the hard way when my nephew's high wedge shot sailed right over my 8-foot screen and crashed into my workbench!
Types of Impact Screen Materials

Understanding the different materials available is crucial for making the right choice. Each material has distinct characteristics that affect performance, durability, and cost. Let me break down what I've learned about the main options.
Polyester Impact Screens
Polyester screens are known for their strength and resistance to tearing, making them a popular choice among DIY builders. My current setup uses a high-quality polyester screen, and it's held up remarkably well over two years of regular use.
These screens typically offer excellent image quality due to their tight weave construction. The material has natural white properties that don't require additional coatings, which can sometimes create hotspots under projector light. The downside is that polyester can be less forgiving on mishit shots, especially if you catch the screen with the club.
I remember the first time I accidentally hit my polyester screen with a 7-iron follow-through. I was convinced I'd ruined it, but after inspection, there was barely a mark. The material's inherent strength really shines in situations like this.
Multi-Layer Fabric Screens
Premium screens often use multi-layer construction combining different materials. This type represents the top tier of impact screen technology, like Carl's Place Premium Impact Screens. The multiple layers serve different purposes - the front layer optimizes image quality, middle layers provide impact absorption, and the back layer offers structural integrity.
While these screens cost more upfront, the performance difference is noticeable. Colors appear more vibrant, and the screen handles repeated impacts much better than single-layer alternatives. If you're serious about your simulator setup and have the budget, this is where you want to invest.
Alternative Materials: Nylon and Spandex
Nylon screens offer excellent durability and are often more affordable than polyester options. However, they can sometimes have a slightly off-white color that affects image quality. For budget-conscious builders, this trade-off might be acceptable.
Spandex screens provide excellent stretch and recovery properties, making them very forgiving on impact. The challenge is that they can be trickier to install and maintain proper tension over time.
I tested a nylon screen for about six months and found it perfectly adequate for casual play. The image quality wasn't quite as crisp as polyester, but for the price difference, it represented good value. The spandex option I tried was interesting but required constant tension adjustments that became annoying.
Top Impact Screen Recommendations by Category
After testing numerous screens and talking with other golf simulator enthusiasts, I've compiled recommendations across different categories. These aren't just based on marketing claims - they're screens I've either used personally or seen in action at friends' setups.
a. Best Overall: Carl's Place Premium Impact Screen

Price Range:$400-$800 depending on size
Material: Multi-layer heavy-duty polyester
Sizes Available: Multiple configurations from 8'x10' to 12'x16'
Carl's Place Premium Golf Impact Screens are made from the best thick, multilayer fabric, using the tightest weave possible, this hitting screen provides superior image quality. I've been using their 10'x12' screen for over a year, and it's exceeded every expectation.
The image quality is outstanding - colors are vibrant, text is crisp, and there are no noticeable hotspots even with my 3500-lumen projector. Ball impacts feel solid but not harsh, and the screen has shown no signs of wear despite thousands of shots. Installation was straightforward with their provided hardware.
The only downside is the price, but when you consider the quality and longevity, it's actually excellent value. I've seen cheaper screens need replacement within a year, making the premium option more economical long-term.
b. Best Budget Option: Cimarron 10'x10' Golf Impact Screen

Price Range: $200-$300
Material: Commercial-grade polyester
Size: 10'x10' standard
This DIY golf simulator screen by Cimarron is simple, but it performs extremely well. It has dimensions of 10 ft x 10 ft and is made of 100% commercial-grade polyester. For budget-conscious builders, this screen offers solid performance without breaking the bank.
I recommended this screen to a friend who was building his first simulator, and he's been happy with the results. The image quality is good, though not quite as refined as premium options. Impact handling is adequate for most golfers, though very fast swing speeds might cause more bounce-back than ideal.
Installation can be a bit more challenging since the hardware package isn't as comprehensive as premium options. You'll likely need to source some mounting hardware separately, but the total cost still comes in well under premium alternatives.
c. Best for Small Spaces: Rain or Shine Golf simDIY Screen
Price Range: $350-$500
Material: Proprietary impact-resistant fabric
Sizes Available: Compact configurations starting at 8'x8'
The simDIY® Simulator Screen is the best impact screen in the industry for tight spaces. This screen is designed specifically for garages and basements where every inch matters.
The compact design doesn't compromise on performance. I tested their 8'x10' model in a friend's low-ceiling basement, and it performed admirably. The material is slightly more flexible than traditional polyester, which helps in confined spaces where mishits are more likely.
One clever feature is the reinforced edge construction that distributes tension more evenly. This reduces the risk of corner tears that can plague smaller screens under high tension.
d. Best for Commercial/Heavy Use: SIGPRO Premier Impact Screen
Price Range: $800-$1500
Material: Multi-layer commercial-grade fabric
Sizes Available: Large format options up to 16'x20'
For those building commercial setups or expecting very heavy use, the SIGPRO Premier represents the top tier. SIGPRO Premier Golf Simulator Impact Screen brings new features & benefits to serious installations.
I've seen these screens in action at a local golf academy, and they're impressive. After thousands of student shots over multiple years, they still look and perform like new. The image quality rivals dedicated projection screens, and impact absorption is excellent even with the hardest hitters.
The installation requires more expertise and better mounting systems due to the screen's weight and size. Professional installation is often recommended, which adds to the total cost.
e. Best Value for Mid-Range: Virtual Golf Simulator Standard Screen
Price Range: $300-$450
Material: Coated polyester blend
Sizes Available: Standard simulator sizes
For the best results, a golf screen should be supported on all 4 sides. That's why our standard golf impact screen is our best seller. This screen hits the sweet spot between performance and affordability.
The coated surface provides good image quality and easy cleaning. The coated surface is smooth and stain-resistant, which makes cleaning fast and easy. A little hot water and stain spray is usually all it takes. I appreciate screens that don't require special maintenance procedures.
Impact performance is solid for recreational use. The screen handles driver shots well, though you might notice slightly more ball return than premium options. For most home users, this difference is negligible.
Installation Guide: Step-by-Step Process
Installing an impact screen properly is crucial for both performance and safety. I've made enough mistakes during installations to know what works and what doesn't. Here's my step-by-step process based on lessons learned the hard way.
a. Planning Your Installation Space
Before unpacking your screen, spend time planning the installation carefully. Measure your space, considering not just the screen dimensions but also the clearance needed around it. I always maintain at least 12 inches of space between the screen and the back wall to avoid unnecessary wear and tear.
Creating a simple sketch showing the screen position, projector location, and hitting area helps identify potential issues before they become problems. Consider factors like ceiling height, lighting, and ventilation that might affect the installation.
Don't forget about maintenance access either. You'll need to clean the screen periodically and possibly make adjustments to tension. Plan your mounting system to allow reasonable access to all areas of the screen.
b. Choosing Your Support System
You have three main options for supporting your impact screen, each with distinct advantages depending on your space and installation preferences.
i. Ceiling-Mounted Tracks
Ceiling-mounted tracks offer the cleanest look and maximize floor space. However, they require solid ceiling joists and can be challenging to install in finished spaces. I used this approach in my garage, mounting tracks to exposed joists with heavy-duty lag bolts. The result looks professional and doesn't take up any floor space.
ii. Wall-Mounted Frames
Wall-mounted frames are often easier to install and provide excellent support when done correctly. The key is ensuring your mounting points hit solid studs or masonry. I always use toggle bolts or masonry anchors rated for well above the expected load. Remember, the screen will experience significant dynamic forces during ball impacts.
iii. Freestanding Frame Systems
Freestanding frames offer maximum flexibility and don't require permanent modifications to your space. Commercial options are available, or you can build your own using PVC or metal conduit. The challenge is ensuring the frame is stable enough to handle impacts without movement or vibration.
d. Step-by-Step Installation Process
🔧 Step 1: Cut All Pipes to Size
1.1 Define Frame Dimensions (example: 8' wide x 7' tall x 2' deep)
Pipe | Purpose | Quantity | Length |
A | Horizontal top & bottom | 2 | 8 ft |
B | Vertical sides | 2 | 7 ft |
C | Rear base supports (depth) | 2 | 2 ft |
D | Rear vertical posts | 2 | 7 ft |
E | Top rear horizontal support | 1 | 8 ft |
1.2 Cut EMT Conduit to These Lengths:Use a pipe cutter or hacksaw. After each cut:
Smooth edges with a deburring tool or sandpaper
Label each pipe with painter's tape (e.g. “A1”, “B1”, etc.)
🧰 Step 2: Build the Floor/Base Rectangle
Lay out 2 long pipes (A) and 2 short pipes (C) on the ground in a rectangle:
A goes front (screen side) and back
C goes left and right (depth)
Connect corners using 90° elbow connectors:
Each corner connects a long pipe and a short pipe
Press or tap fittings in firmly with a rubber mallet
Double-check that the rectangle is square by measuring both diagonals – they should match.
Step 3: Add Uprights (Front & Rear Vertical Supports)
At the front corners, insert the two vertical pipes (B) into the elbow fittings.
At the rear corners, insert the two rear vertical pipes (D) into the back elbow fittings.
Step 4: Add Top Horizontal Bars (Front and Back)
Connect a long horizontal pipe (A) across the top front, joining the tops of both front verticals (B) using 90° elbows.
Do the same for the top rear, connecting the rear verticals (D) with pipe (E).
Step 5: Stabilize the Structure
At this point, the structure is a 3D box — a “goal post” frame with a rear rectangle to stabilize it.
Optional but recommended:
Add diagonal corner braces or T-connectors for additional stiffness
Add floor plates or weights if placing on a slippery floor
🪢 SCREEN ATTACHMENT – Detailed Guide
Step 6: Prepare the Screen for Mounting
Unroll your impact screen and lay it flat.
Locate the grommets (holes around the edge). These will be used to fasten the screen to the front face of the frame.
Step 7: Attach the Top Edge First
Use ball bungees (or zip ties if necessary):
Insert the bungee through the top-center grommet
Wrap it around the top front horizontal pipe (A) and secure it
Work outward from the center:
Attach the next grommet to the left, then to the right
Repeat until the top edge is fully secured
Leave a little slack between bungee and pipe – don’t overtighten. The screen needs some give to absorb impact.
Step 8: Attach the Sides
Begin from the top down:
Use bungees to fasten each side grommet to the vertical frame pipes (B)
Keep tension even but not tight:
The screen should hang taut enough to avoid sagging
But loose enough to absorb ball impacts without bouncing back
Step 9: Secure the Bottom
Fasten the bottom edge grommets to the lower front pipe (A) using bungees or ties.
You can add soft weights or foam tubing at the bottom to keep it from flapping or curling upward when hit.
Optional Add-Ons for Performance & Safety
Add foam pipe insulation along the front pipes to reduce bounce-back.
Use side netting clipped to the frame to catch stray shots.
Mount a projector screen or turf mat in front for a full simulator setup.
Final Check – Your Frame Should:
Be sturdy and square
Sit flush with the floor
Have the screen hanging slightly forward of the frame
Let the screen “give” a little when pushed
Proper Screen Tensioning Techniques
Getting the tension right on your impact screen is both an art and a science. Too loose, and you'll get poor image quality with excessive ball bounce. Too tight, and you risk tearing the screen or creating stress points that will fail over time.
a. Testing and Achieving Optimal Tension
The right tension creates a slight give that absorbs impact energy while maintaining a flat projection surface. A general rule of thumb is that a golf ball struck with a driver should bounce back 1 to 3 feet from the screen. This measurement has become my go-to test for proper tension.
Here's my simple testing method:
Palm Push Test - Gently push the center of the screen with your palm. It should deflect about 2-3 inches with moderate pressure. More deflection indicates insufficient tension, while less suggests the screen might be too tight.
Visual Inspection - The screen surface should appear flat and smooth under projector light. Wrinkles, sags, or tight spots all indicate tension problems that need correction.
Ball Bounce Test - Hit a few practice shots and observe the ball return. Excessive bounce or dead drops both indicate tension issues.
Maintenance and Care
Proper maintenance extends screen life dramatically and maintains optimal performance. I've seen screens last five years or more with good care, while neglected screens might need replacement in less than a year.
a. Essential Cleaning Procedures
You can remove most stains and marks with little more than gentle soap, a cloth or sponge and warm water. I clean my screen monthly during heavy use periods and less frequently during off-seasons.
Follow this cleaning process for best results:
Dry Cleaning First - Start with a soft brush or vacuum with a brush attachment. This removes dust and loose debris that can affect image quality. Pay special attention to the hitting area where ball marks accumulate.
Wet Cleaning Method - Use warm water and mild detergent, working in small sections. Clean gently and allow each area to dry before moving on. Never soak the screen or use abrasive cleaning products.
Stubborn Stain Removal - Test any specialized cleaners on an inconspicuous area first. Most marks come out easily with patience and gentle cleaning techniques.
b. Inspection and Preventive Care
Monthly inspections help catch problems before they become serious. Look for loose grommets, stress marks around mounting points, and any signs of material fatigue. Small issues are usually easy to fix, while major problems often require screen replacement.
Check mounting hardware regularly, especially during seasonal temperature changes. Verify the alignment of the projector and other components to ensure everything remains properly positioned. Keep adjustment records to track patterns and identify potential problems early.
Tension adjustments are normal maintenance that most screens will require over time as materials settle and environmental conditions change. Temperature changes affect screen tension significantly - materials expand and contract with temperature swings, requiring periodic adjustments.
c. Golf Ball Selection and Impact Considerations
Using clean golf balls which are not scuffed significantly extends screen life. Dirty or damaged balls can create marks and cause premature wear. I keep a separate set of "simulator balls" that are clean and in good condition.
Using separate golf balls for your simulator is a smart practice. Regular range balls or heavily used balls can have surface irregularities that damage screens. Premium simulator balls are designed to be gentler on impact screens while still providing realistic flight characteristics.
Consider ball type based on your skill level and swing speed. Softer balls are easier on screens but might not provide realistic feedback for advanced players. Harder balls offer better realism but require more robust screen construction.
Troubleshooting Common Issues
Every golf simulator owner encounters problems eventually. I've dealt with most common issues and learned effective solutions through trial and error. Here are the problems you're most likely to face and proven solutions.
Common Image Quality Problems
Hotspots are among the most common projection issues - these bright spots appear where the projector light reflects directly back to viewers. Usually, hotspots indicate either projector positioning problems or screen material issues.
Here's how to diagnose and fix image problems:
• Hotspot Solutions - Try adjusting projector angle first, as sometimes a few degrees makes a huge difference. If that doesn't work, the screen material might be too reflective or developing reflective spots from repeated impacts.
• Color Distortion Issues - Can result from screen contamination or material degradation. Clean the screen thoroughly and check for discoloration. Sometimes what appears to be a screen problem is actually projector lamp aging.
• Wrinkles and Uneven Surfaces - Destroy image quality and indicate tension problems. Systematic retensioning usually solves these issues, but persistent wrinkles might indicate permanent material deformation.
a. Impact-Related Problems
Excessive ball bounce indicates insufficient tension or inappropriate screen material. Remember, a golf ball struck with a driver should bounce back 1 to 3 feet from the screen when properly set up. Greater bounce distances suggest problems with tension or screen selection.
Tears and punctures are serious problems requiring immediate attention. Small tears can sometimes be repaired with appropriate patch materials, but large tears usually require screen replacement. Prevention through proper tension and good ball selection is much easier than repairs.
Strange impact sounds often indicate mounting problems. Loose hardware or insufficient frame rigidity can create rattling or slapping sounds during ball impact. Check all mounting points and tighten hardware as needed.
b. Installation and Mounting Issues
Sagging screens usually result from inadequate support or mounting hardware failure. Check all mounting points for looseness or failure. Sometimes, the problem is simply inadequate hardware for the load - upgrade to heavier-duty components if necessary.
Uneven tension creates performance problems and can lead to premature failure. Work systematically around the screen, checking tension at multiple points. Use a consistent method for measuring and adjusting tension to ensure uniformity.
Frame movement during impacts indicates insufficient stability. Freestanding frames might need additional bracing or weight. Wall-mounted systems might need additional anchor points or stronger hardware.

Budget Planning and Cost Considerations
Building a quality golf simulator impact screen setup requires careful budget planning. Costs can range from a few hundred dollars for basic setups to several thousand for premium installations. Understanding where to invest your money produces the best results.
a. Breaking Down Initial Investment
Screen costs vary dramatically based on size, material, and features. Budget screens start around $200-300, mid-range options run $400-600, and premium screens can exceed $1000. Don't forget to factor in mounting hardware, which can add $100-300 to your total cost.
Here's what to budget for a complete setup:
Screen Cost - $200-$1000+ depending on quality and size
Mounting Hardware - $100-$300 for quality components
Installation Tools - $50-$150 if you don't own basic tools
Professional Installation - $200-$500 (optional but recommended for complex setups)
Consider the total system cost when budgeting. The screen is just one component - you'll also need a projector, launch monitor, hitting mat, and potentially enclosure netting. A balanced approach that doesn't over-invest in any single component usually produces the best results.
b. Long-Term Cost Analysis
Quality screens last significantly longer than budget options, making them more economical over time. I've seen premium screens provide five years or more of service, while budget screens might need replacement in 1-2 years with heavy use.
Maintenance costs are generally minimal but should be considered: • Cleaning supplies and occasional hardware replacement • Potential repairs for minor damage • Periodic tension adjustments (usually DIY)
Factor in upgrade costs when planning your initial investment. Many golfers start with basic setups and upgrade components over time. Choosing mounting systems and screen sizes that accommodate future upgrades can save money long-term.
c. Smart Shopping Strategies
Buy the best screen you can reasonably afford, even if it means waiting longer to complete your setup. The screen is used for every shot and has a major impact on your overall experience. Skimping here often leads to disappointment and additional costs later.
Consider package deals from reputable manufacturers - many companies offer complete enclosure kits that include screens, netting, and mounting hardware at better prices than individual components. However, verify that all components meet your quality standards before committing.
Shop during off-seasons when golf equipment typically goes on sale. Many manufacturers offer discounts during winter months when demand is lower. Planning ahead can result in significant savings on quality equipment.
Expert Tips for Optimal Performance
After years of experience and conversations with other golf simulator enthusiasts, I've collected numerous tips that can dramatically improve your impact screen performance. These insights come from real-world experience, not just theoretical knowledge.
a. Advanced Installation Techniques
Create a slight curve in your screen installation for improved image quality and impact characteristics. A gentle arc that curves away from the golfer at the edges can reduce edge distortion and provide better ball containment. This technique requires careful planning but produces excellent results.
Here are three advanced techniques that can dramatically improve performance:
Curved Installation Method - Creates a gentle arc that improves projection geometry and ball containment. Requires custom mounting points but delivers professional-level results.
Dual-Layer Setup - Uses a projection screen mounted in front of an impact-absorbing layer. This maximizes image quality while providing excellent impact protection, though it's more complex and expensive.
Adjustable Mounting Systems - Allow seasonal tension changes for temperature and humidity variations. Systems that allow easy adjustments help maintain optimal performance year-round.
b. Performance Optimization Tips
Experiment with ball types to find the optimal combination of realism and screen protection. Different ball constructions interact differently with various screen materials. Keep notes on ball performance and screen wear to identify the best combinations for your setup.
Consider these performance enhancements: • Subtle ambient lighting to improve viewing experience and reduce eye strain • Monitor and log screen performance over time to track tension changes and maintenance needs • Use proper ball selection - clean, undamaged balls significantly extend screen life
c. Safety and Longevity Guidelines
Always maintain proper clearances around your screen installation. Correct installation requires secure hanging methods and maintaining adequate spacing between the screen and the baffle. Adequate spacing prevents damage from ball rebounds and provides access for maintenance.
Implement a baffle net system behind your impact screen for additional protection. A baffle net delivers several important benefits within a DIY simulator, with its core function being high-energy impact absorption. This secondary protection system can prevent damage from particularly hard shots or mishits.
Establish usage guidelines for your simulator, especially if multiple people will be using it. Different skill levels and swing speeds affect screen wear patterns. Educating users about proper technique and ball selection helps extend screen life significantly.
Conclusion
Building a DIY golf simulator with a quality impact screen has been one of my most rewarding projects. Sure, I made plenty of mistakes along the way - from choosing the wrong screen initially to struggling with proper tension - but each challenge taught me something valuable that improved my setup.
Key Takeaways for Success
The impact screen is truly the heart of your simulator system, affecting every aspect of your experience:
• Image Quality - Determines how crisp and clear your virtual golf course appears
• Safety - Properly installed screens protect both equipment and users
• Durability - Quality screens with proper maintenance can last 5+ years
• Performance - Correct tension and setup dramatically improve ball flight realism
Remember that your perfect setup might look different from mine. Consider your space constraints, skill level, budget, and usage patterns when making decisions. The beauty of DIY projects is the ability to customize everything to your specific needs and preferences.
I'd love to hear about your own golf simulator projects and experiences. Share your successes, challenges, and creative solutions in the comments below - your insights could help the next person tackle their dream setup!


Comments